I haven’t shared any DIY crafts for a long time. But now I think it is about time to start posting them again. Today is a good time to share with you this Queen of Hearts doll that is made from toilet paper roll since the day of hearts is coming.
I love making stuff using recycled materials. One of my favorite materials is toilet paper roll because there are so many things that we can make with it. Although my daughter has many dolls and other toys, she would ask me to make something for her from time to time. She said she likes it when we do some crafts.
Aside from learning how to do it, she thinks that it is cool to actually own a toy that we made. She said it is something that other kids won’t have. So today, I will share with the steps on how we made this toilet paper doll. It isn’t that hard actually. It won’t take a lot of time to make too.
What You Need:
- 1 toilet paper roll
- construction paper of different colors
- glue
- pair of scissors
- pencil
- gold tin foil
Instructions:
1. After gathering your supplies, start working on your toilet paper roll. I covered the upper portion with cream paper and the lower part with pink paper.
2. To make the pink paper look like a dress, I formed a cone and cut the upper portion before sticking it around the roll. I also cut two oval shapes from white paper and two round shapes from black paper for the eyes. Then I draw the lashes.
3. Now it’s time to use the red colored paper. I cut the lips from it and some hearts to decorate the dress. Of course, you can make different designs for your dress. Just be creative.
4. I wanted the doll to have yellow hair. To do that, fold a rectangular paper into strips and then cut it. It is nice to make different lengths of the paper strips so that the hair will look layered.
5. Glue it one by one around the doll’s head.
6. To make the hair prettier, get your pencil and roll the strips around it. The result will be stunning!

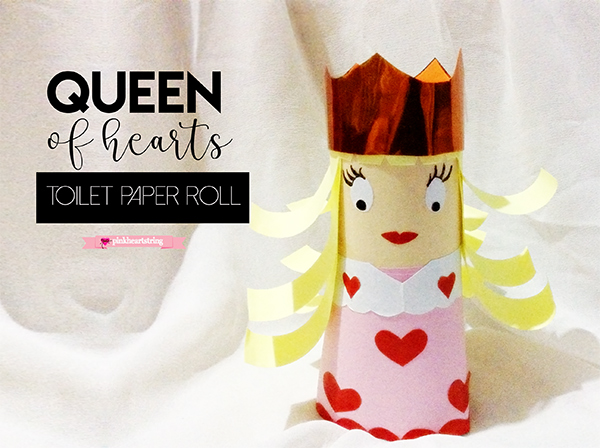
Your Queen of Hearts doll is now done! But of course, you can also add a crown and a royal hat like the one we made. Unfortunately, I wasn’t able to take pictures anymore when we made them.
In making the crown, I just cut a long paper and roll it around the doll. I cut my desired shape for the crown. Then I covered it with gold tin foil. You will not glue this on the head. It’s a hair accessory that can be removed so you can switch into something else like a hat.
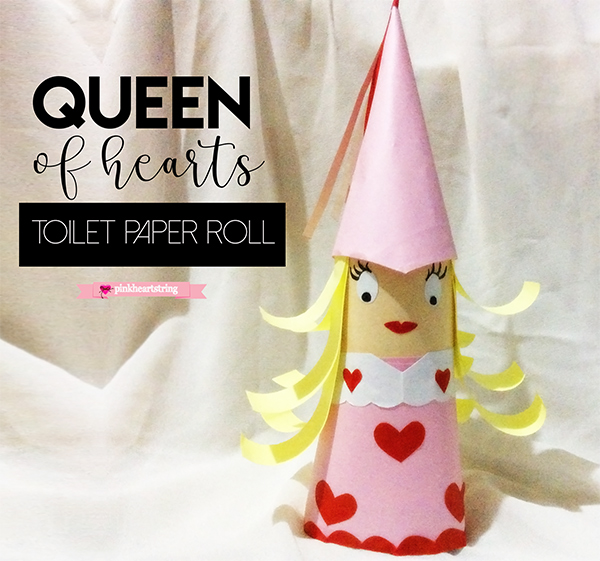
To make the tall hat, I roll a pink rectangular paper. Trim the bottom part to make sure the doll’s eyes won’t be covered. Once it fits well, cut strips of the gold tin foil and attach it at the tip of the hat. Now you have a crown and a hat that your doll can use!
Don’t forget to cover the top portion of the roll so that she still has bangs even without the crown and the hat. The hair looks like this after curling them:


Did you like this DIY craft for kids? Well, I hope you did! I also made a bunny using toilet paper roll. I’ll share more of my crafts in the next posts. So, make sure to like my Facebook page or follow me on Twitter @blessedliez and on Instagram @mommyk_pinkheartstring.
If you want to make this with your kids, you can Pin it for later:

I hope you liked this DIY toilet paper craft I made. Did you try making one too? Share it in the comment section below.

This is cute – I like how you've done the hair! I remember making so many things out of toilet rolls as a kid! Haha #blogcrush