A quick DIY solution to your kid’s scattered toys!
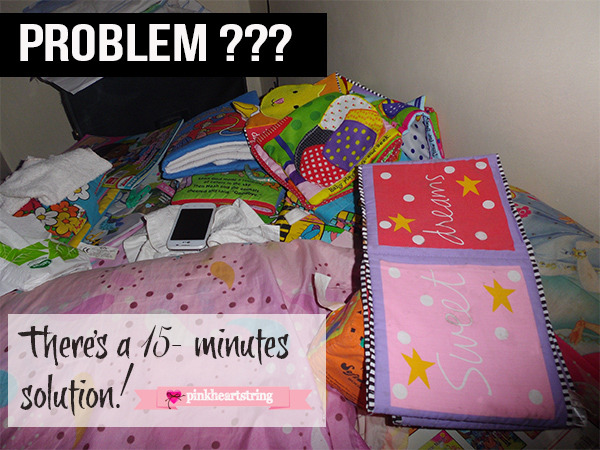
Every mom faces the battle of keeping our kid’s mess everyday. Toys and books are scattered everywhere and we don’t have a choice because these are kids and they need to play to develop themselves. That is why, we endure that every day struggle of keeping the toys scattered on the floors, bed, sofa and just anywhere!

But I discovered a simple solution for you. If you do not have cardboard boxes for toy storage, then grab tulle, an old tshirt, an old blanket and just whatever fabric, even a big towel or a curtain will work well for this hack.
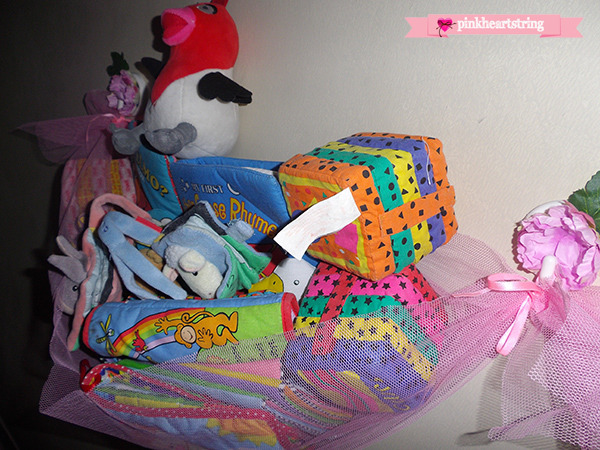
You can make a Hammock toy storage which will only take a few minutes to finish. Well, if you choose the simpler way of making it, you will be able to finish it in less than 15 minutes. But in my DIY Hammock Toy Storage, I add some girly features on it so it can double as a wall decor.


See? It looks nice on the wall. So, if you have a blank wall, you can use up that space with a wall storage like this. Like what I said, it is very easy to make.
What You Need:
Tulle or any type of cloth/fabric
Ribbon or string
Wall hooks (to skip the nailing or screwing part, buy those with double adhesive at the back)
How to Make:
1. Simple. Get the tulle or fabric and fold it into two. Tie both ends with a ribbon or string.

2. Get your wall hooks. You can skip this step if you want to. I added faux flowers on my wall hooks to add beauty to it. Use hot glue to attach the flowers. After doing that, attach the hook on the wall. See to it that your spacing is right and both are leveled because you will hang your hammock here.

3. Install on the wall. In the image below, you can see how everything was put together. Hang the tulle on the ribbon part. You can also tie it on the hook to make sure it will not fall.

4. Put the toys in your hammock and you are all done!

I told you this is going to be very easy! I made this like 6 months ago and I still have this on my wall. Works really well. And my daughter learned how to keep her own toys too on this hammock.
You can make one for your child and once you did, I’d love to see how you made yours! If you don’t want this kind of toy storage, you can make the Cardboard Toy Box using unused cardboard boxes in the house.

nice DIY tip! my nephew just throws away every toy he has inside the room. i am gonna suggest this to his mother. 🙂 your blog looks so girly and neat. 🙂
-aikaloraine.com
In our case, we invested in plastic storage cabinets for the kids back when they were younger knowing the plastic cabinets can be used for a long time.
Our rule then was simple. Kids are not allowed more than two toys and before they could get others, they need to pack up previous ones.
Not only is it useful it also looks cute. Like you've created a decor on the wall. Cool!
Haha, so cute and a nice way to store those toys minus the eye sore.
That's very creative and resourceful… this is also my mom's problem with my little brother… he never learned how to put his toys back after playing with them… good thing he is not into toys anymore but more into video games (but still a messy one haha)
thanks for sharing.. gosh I missed my art blog so much.. i haven't update it for like 3 years now
I find wall hooks with double adhesive not suitable for toys. They will get heavy and drop every time. I think the nails or the screws would be better. I have a place my son keeps all his toys. He takes a few at a time, and when he gets bored with them, he takes them back to the toy box. I like the idea of the hammock, but maybe for other items. East to create, and a nice DIY tip
Very creative, haha! I liked how you can turn a plain wall and make it useful, teaching your kids to be neat too, in the process. Very girlie and orderlySonnie
What a creative way to store toys. In fact, this can work not just for toys but for anything one needs to put away, just change the colors to suit the style of the room. I also like this because even if you can see through and can see the actual “mess,” when placed in the hanging tulle, it looks pretty. One doesn’t actually need to hide the toys and things. I also like how you don’t need to buy anything and can just use whatever is lying around to make this decorative piece.
This is such a brilliant idea, I come home from work to always find it looking like a toy graveyard!! haha! We have a lot of ikea storage for toys to go into but I love this so much. When we come to redecorate my daughters room I may do this for some of her not so loved soft toys.
This is such a cute idea. Super decorative as well.
That's a sweet idea ! So easy to make , and very cheap aswell . All it needs is the idea , really sweet ! And you can make so many different styles with it . Great !
Wow so creative! I love it. Now you gave me an idea on what to do in scattered things in our house. I hope I can create a hammock that can carry me hahahah. Its so cute 🙂
Cool idea. Our house is a mess because of my son's toys and books. I should try this when I got a day off from work.
~Lady's Motherhood Journey~
This sounds like a great idea. I'm thinking of making this becaus emy daughter has a lot of toys! Thanks!
I love this DIY! It's so useful and it's cute–a hammock for toys, now who would've thought of that? I think my little one has too many toys though–he'll need five hammocks to fit everything.
Thanks so much for sharing! Lots of thanks for this post.I think it is a very good post. It helps us many away. So many many thanks for this article.
That's a really pretty idea actually. But I don't think pink tulle would be ideal storage for a boy's room. Plus, the capacity will only work if you've got lighter items like cloth books and stuffed toys, like what you have tin the pictures. Otherwise you're better off banging in a shelf instead!
I have been meaning to make one of these for my kids. I kept hesitating because I thought it was super complicated. Now I'm definitely gonna get it done.